![]()
Eodag search plugin
The eodag-labextension JupyterLab plugin brings satellite imagery search ability. With that extension you can search products, see results and check if results corresponds your needs and finally generate Python code allowing to access to those products in the notebook.
That tool is based on eodag.
Search
![]() Activate the plugin tab on the left of the JupuytuerLab interface by clicking on that icon.
Activate the plugin tab on the left of the JupuytuerLab interface by clicking on that icon.
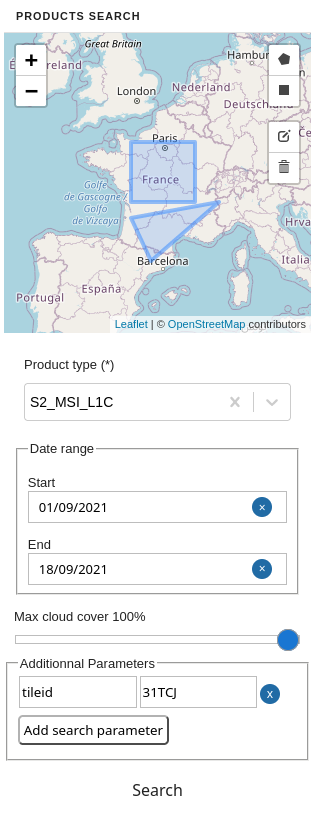
With displayed search form, you can enter search extent and following search criteria:
- Product type: the searched product type. For each entry of the drop-down list, a tooltip is displayed at hovering time with corresponding description.
- Start date: minimal date of the search temporal window.
- End date: maximal date of the search temporal window.
- Max cloud cover: maximum cloud cover allowed in search results in percent.
- Additional parameters: used to enter key-value pairs criteria for the request.
You can draw multiple extents, or use none. Each extent can be a rectangle or a free polygon. Product type is mandatory. Other criterias are optional.
Once search criteria are filled out, click on the "Search" button to proceed to next step. At the end of the search, a popup opens and displays results.
Results display
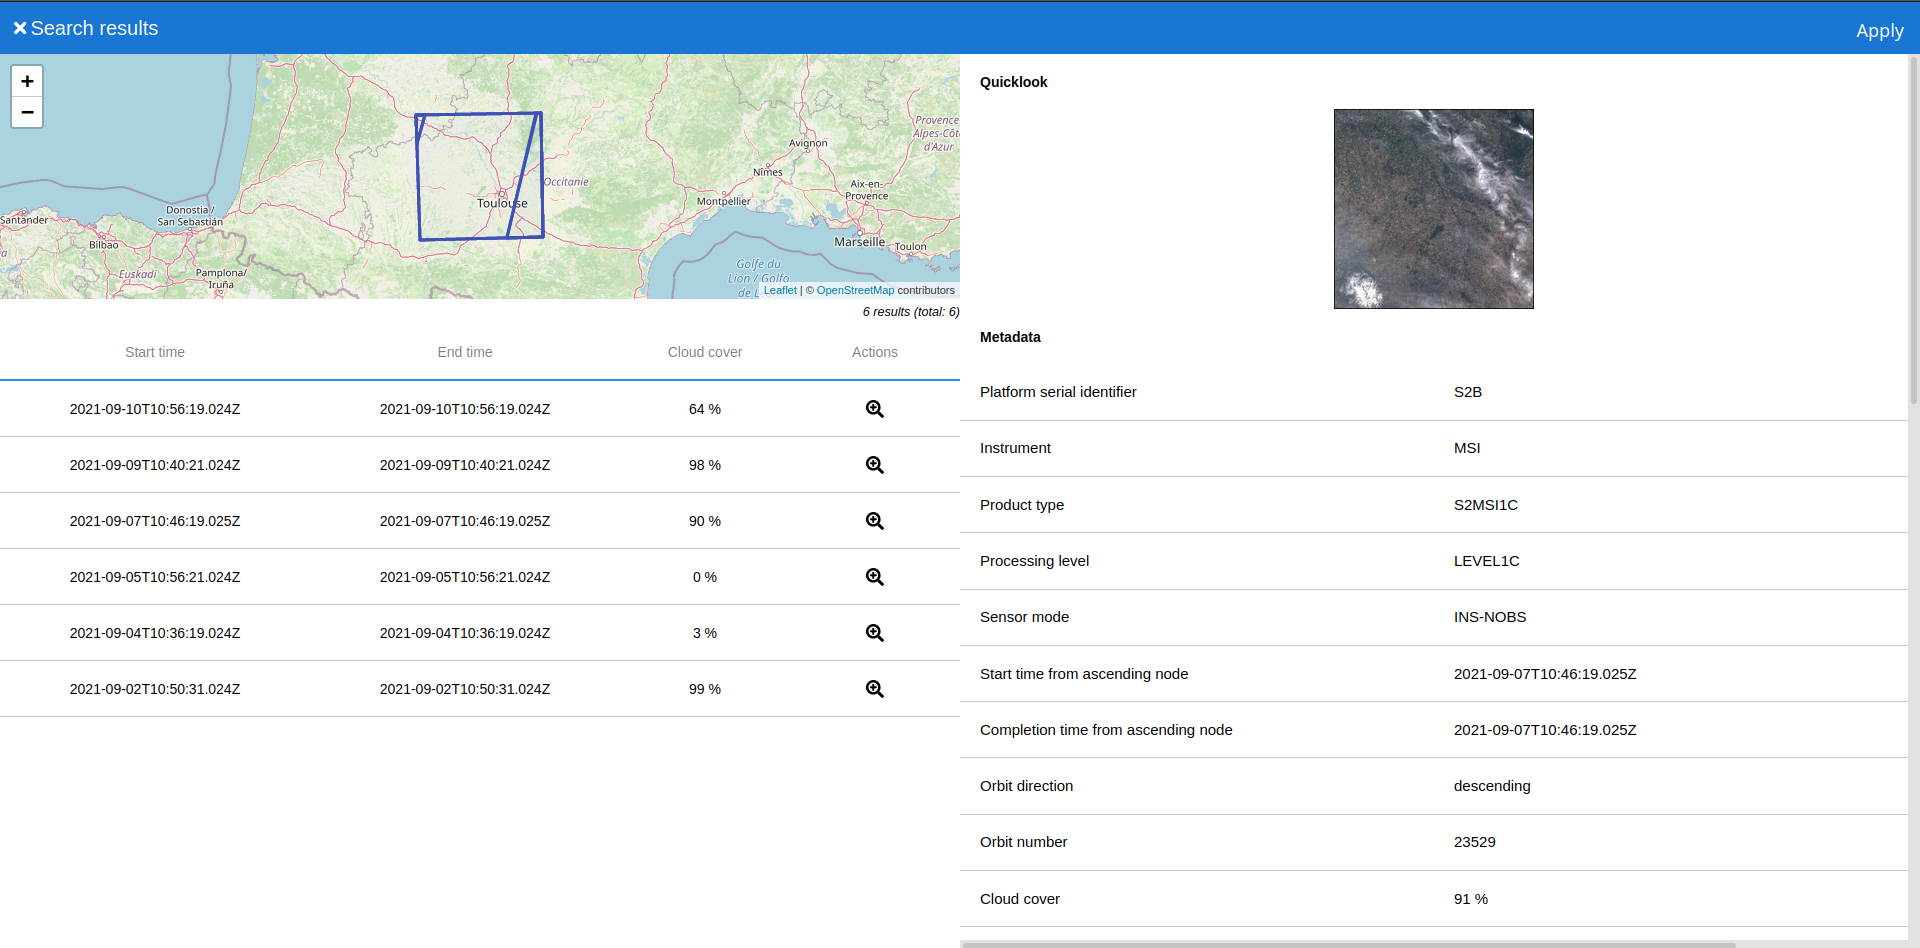
The results display popup is composed of 3 parts:
- a map showing products extent,
- a table listing products,
- a pane containing metadata for currently selected product.
The results table allows you to access product metadata by clicking on the desired product line. The magnifying glass button allows you to zoom in on the product's in the map view. By scrolling down in the list of results, the search is automatically restarted to retrieve the following results.
In the metadata view, clicking on the thumbnail displays it in native resolution. Clicking it again reduces its size again.
Apply to the Jupyter notebook
If the search result is correct, clicking on the "Apply" button will insert the Python eodag code in a new cell of the currently open notebook. The popup is automatically closed. From there, it is possible to work in the notebook on the search results by executing the eodag search.
Here is an example of generated code:
from eodag import EODataAccessGateway
dag = EODataAccessGateway()
product_type = 'S2_MSI_L1C'
footprint = {'lonmin': 0.660957, 'latmin': 43.149093, 'lonmax': 2.388008, 'latmax': 44.190082}
cloud_cover = 15
start, end = '2019-02-01', '2019-02-15'
search_results, estimated_total_nbr_of_results = dag.search(
    productType=product_type,
    geometry=footprint,
    startTimeFromAscendingNode=start,
    completionTimeFromAscendingNode=end,
    cloudCover=cloud_cover,
)
The eodag configuration file should be located at $HOME/.config/eodag/eodag.yml. See eodag documentation for further information.
You may want to enforce usage of a particular provider. To do so, use set_preferred_provider and then execute a query like previously:
dag = EODataAccessGateway()
dag.set_preferred_provider("theia")
Using results
Here are some examples about how to use search results into a notebook:
from pprint import pprint

# Display results list
pprint(search_results)

# Display products access paths
pprint([p.location for p in search_results])
Extract products extent
from eodag.api.search_result import SearchResult
results_geojson = SearchResult(search_results).as_geojson_object()

from shapely.geometry import shape, GeometryCollection
features = results_geojson['features']
features = GeometryCollection([shape(feature["geometry"]).buffer(0) for feature in features])
features
Display products extent on a slippy map
import folium
from folium import plugins
ext = features.bounds
bounds = [[ext[1], ext[0]], [ext[3], ext[2]]]
m = folium.Map(
    tiles='Stamen Terrain',
    control_scale=True,
)
folium.GeoJson(results_geojson).add_to(m)
m.fit_bounds(bounds)
folium.Figure(width=500, height=300).add_child(m)
Downloading products
To download products from the search request into a sub-directory called download, run:
dag.download_all(search_results)
Verbosity
Eodag and amalthee verbosity can be increased with with setting verbose level to 1,2 or 3:
- INFO:
verbose=1 - DEBUG:
verbose=3
from eodag.utils.logging import setup_logging
setup_logging(verbose=3)
Credits
That extension is released under Apache-2.0 License. See source code repository.
See also eodag documentation for more insight and tutorials about eodag library.