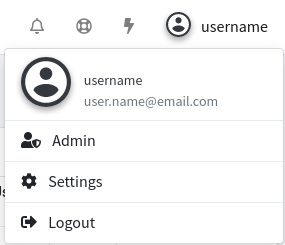
Admin section
If you have sufficent access, you can access the admin section here.
Or directly via the launcher here :
Applications
Applications are displayed on the left sidebar. Each of them reference a website that can be opened inside an iframe.
To add new applications, go to Admin > App > Applications and click on Add Application.
Applications attributes:
- App order: Order of the applications in the left sidebar. Lower numbers are displayed on top.
- Id: Unique string identifier of the application.
- Name: Name of the application.
- Url: Url of the application that will be integrated inside an iframe. Some application URL may depend on current user, you can reference username in URL with
{USER}. (Example:https://jupyterhub.server/user/{USER}/lab) - Visible: Choose if the application is visible in the left sidebar.
- Keep Loaded: Choose if the application remain open when you change application. (Does not work between page reloads)
- Require Login: Choose if the application require to be logged in to be displayed.
- Icon type: Choose the icon type. It can be either
faorsvg(Icon definition is set in the options) - Options: Custom options for the application. It is a JSON string with each option being a key-value pair.
List of options:
- icon (IconType=
fa): Icon definition. (Example:"icon": "fas fa-book") - svg_content (IconType=
svg): SVG content definition. (Example:"svg_content": "<path d="..."/><path d="..."/> ...") - svg_path (IconType=
svg): SVG path definition. Can be used instead ofsvg_contentif your svg only has one path (Example:"svg_path": "M16.265 24.136c-5.068 ...") - svg_width (IconType=
svg): SVG width. (Example:"svg_width": "24px") - svg_height (IconType=
svg): SVG height. (Example:"svg_height": "24px") - svg_viewbox (IconType=
svg): SVG viewbox. (Example:"svg_viewbox": "0 0 32 32") - tooltip: Tooltip text displayed when hovering on the icon. (Example:
"tooltip": "JupyterLab is a tool for ...")
Complete options example (for JupyterLab with Jupyter Logo as SVG):
{
  "tooltip": "JupyterLab enables you to work with documents and activities such as Jupyter notebooks, text editors, terminals, and custom components in a flexible, integrated, and extensible manner.",
  "svg_path": "M16.265 24.136c-5.068 0-9.599-1.871-12-4.537c.932 2.401 2.537 4.537 4.667 6c2.136 1.469 4.667 2.265 7.333 2.265s5.204-.796 7.333-2.265c2.136-1.463 3.735-3.599 4.667-6c-2.401 2.667-6.932 4.537-12 4.537zm0-17.605c5.068 0 9.599 1.871 12 4.537c-.932-2.401-2.531-4.537-4.667-6c-2.265-1.599-4.796-2.401-7.333-2.401c-2.667 0-5.197.803-7.333 2.265c-2.129 1.599-3.735 3.599-4.667 6.136c2.401-2.803 6.803-4.537 12-4.537zM25.599.136c-2.489 0-2.489 3.728 0 3.728s2.489-3.728 0-3.728zM6.803 27.068a2.397 2.397 0 1 0 0 4.796a2.395 2.395 0 0 0 2.395-2.395a2.396 2.396 0 0 0-2.395-2.401zm-2-24c-1.781 0-1.781 2.667 0 2.667c1.776 0 1.776-2.667 0-2.667z",
  "svg_width": "24px",
  "svg_height": "24px",
  "svg_viewbox": "0 0 32 32"
}
Preferences
Preferences are used to store user preferences.
You can see preferences inside the Admin Page > App > Preferences. It's not recommended to edit preferences directly as they are managed automatically by the client.
Tutorials
Tutorials are displayed in the dashboard under the Tutorials widget. They can be used to open a specific applications at a specific url.
To add new tutorial, go to Admin > App > Tutorials and click on Add Tutorials.
Tutorials attributes:
- Tutorial Order:: Order of the tutorials in the list. Lower numbers are displayed on top.
- Title: Title of the tutorial.
- Url: Url link to the tutorial. You can reference an application by it id and follow it by the path to add to the app url (Example:
#jupyter_lab/user/{USER}/lab/tree/ai4geo-docs/index.ipynbwill open a specific notebook in the jupyter_lab app). - Thumbnail: URL to the thumbnail of the tutorial. To set a django summernote attachment, you need to add the
media/prefix to the url. (Exemple:media/django-summernote/<summernote_image_id>.png) - Content: Description of the tutorial.
Reference application and/or open specific docs page
In Tutorial URL, you can specify an application to open it at a specif URL. You can aslo reference a docs page and it will open docs right panel at specified URL.
For application, use #<application id>/<custom path>.
For docs page, use #?launcher-wiki-url=<docs path>. You can find your docs path> here in the docs URL: https://<launcher-url>/docs/<docs path>
You can combined both application and docs page in your URL.
launcher-wiki-url will be pass to the application path but will probably not interfere with it as it's a pretty specific param name.
Examples:
- Open specific notebook inside jupyterlab app:
#jupyter_lab/user/{USER}/lab/tree/ai4geo-docs/index.ipynb - Open specific docs page:
#?launcher-wiki-url=tutorials/hydro/scenario_hydro_1.html - With both:
#jupyter_lab/user/{USER}/lab/tree/ai4geo-docs/index.ipynb?launcher-wiki-url=tutorials/hydro/scenario_hydro_1.html
JupyterHub Instances
The Launcher uses JupyterHub API to start and stop jupyter server from the top right button. Add an instance to fill the URL, api token and profiles of JupyterHub
To add an instance, go to Admin > JupyterHub > JupyterHubInstances and click on Add JupyterHubInstances.
JupyterHubInstances attributes:
- Name: Name of the JupyterHub Instance.
- URL: URL of the JupyterHub Instance.
- API Token: API Token of the JupyterHub Instance (created by an admin).
- Profiles: Profiles available in the JupyterHub Instance.
- Default: Is this instance the default one used by the Launcher?
For now, only one instance can be used by the Launcher (the default one).