Getting started with the VRE
JupyterLab launcher
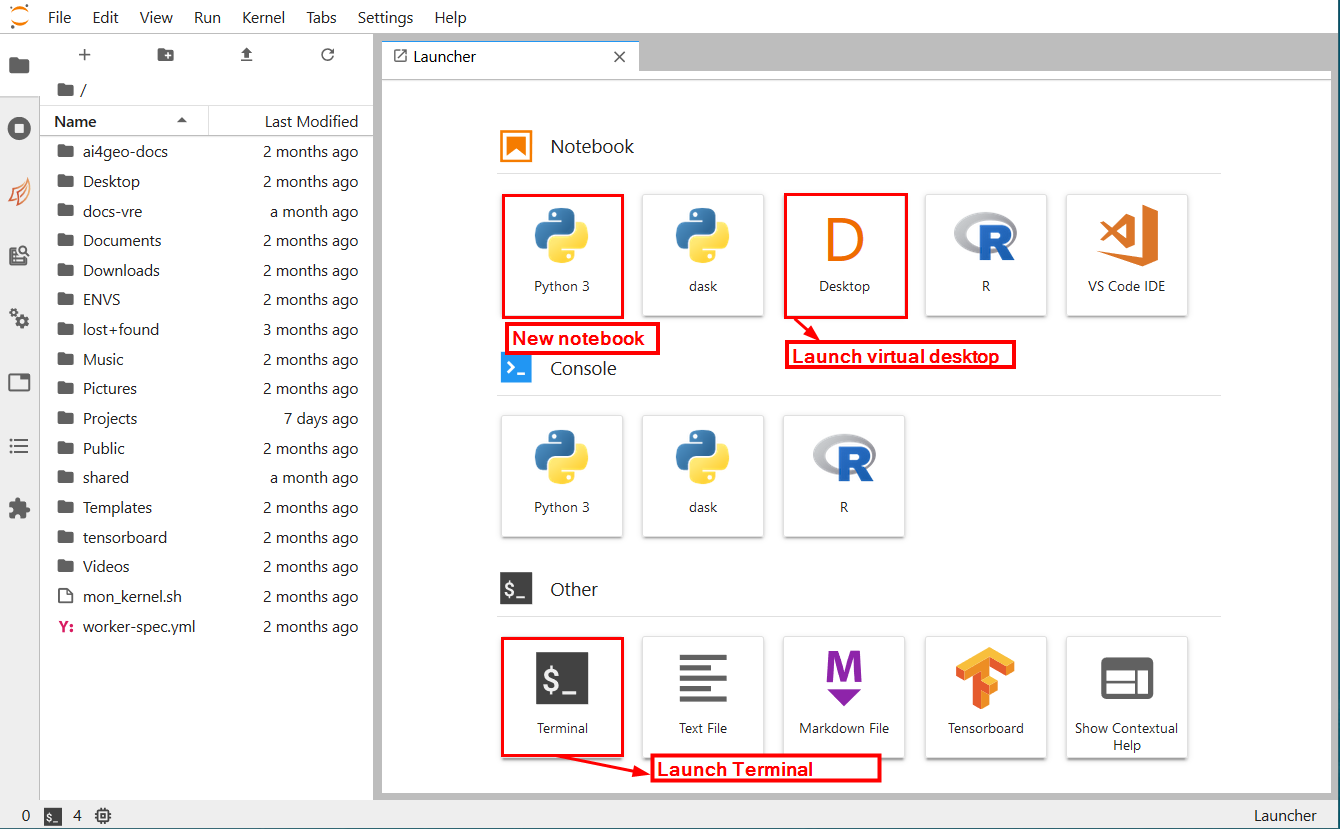
The JupyterLab launcher gives access to the main features of the VRE. If the launcher is not visible, click File -> New Launcher (or Ctrl+Shift+L)
In that tutorial, the 3 most useful tools are:
- Create a Jupyter notebook
- Execute the virtual desktop
- Start a terminal
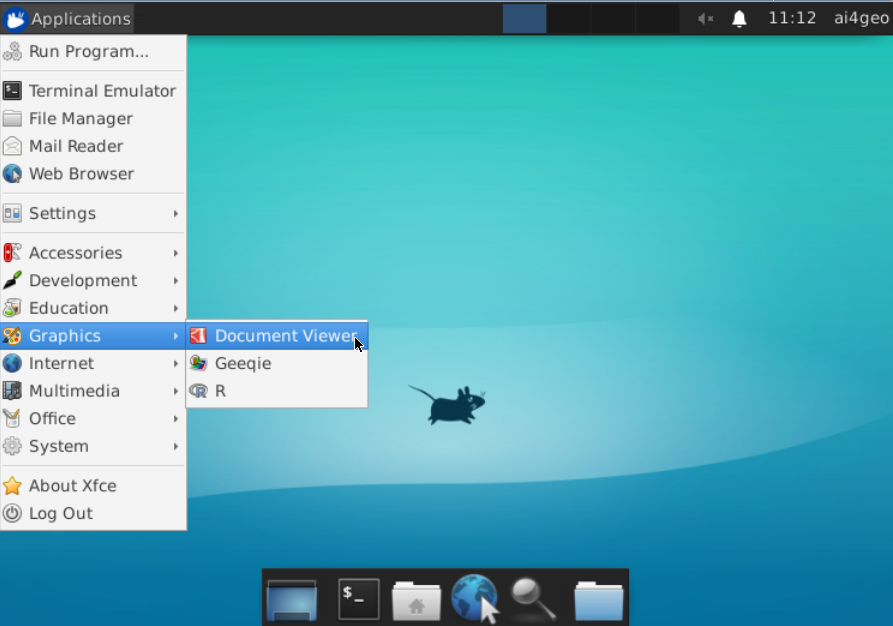
Virtual Desktop
The Virtual Desktop can be used to launch specific tools, such as a GIS software, office tools, etc.
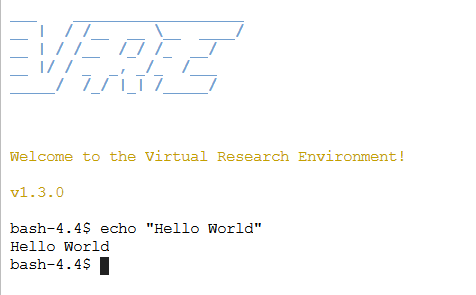
Terminal
The terminal is a classic Bash command processor, that runs in a text window. Its documentation can be found here : https://www.gnu.org/software/ bash/manual/bash.html
Jupyter notebooks
The Jupyter notebook is a powerful scripting tool.
Notebook documents (or “notebooks”, all lower case) are documents produced by the Jupyter Notebook App. They contain both computer code (e.g. python) and rich text elements (paragraph, equations, figures, links, etc…). Notebook documents are both human-readable documents containing the analysis description and the results (figures, tables, etc..) as well as executable documents which can be run to perform data analysis.
The code is split in "cells" that can contain either:
- Code : to execute Python code. When the code is run, the notebook displays the output below the code cell that generated it.
- Markdown : to display information in place where the cell is run
Starting a new notebook
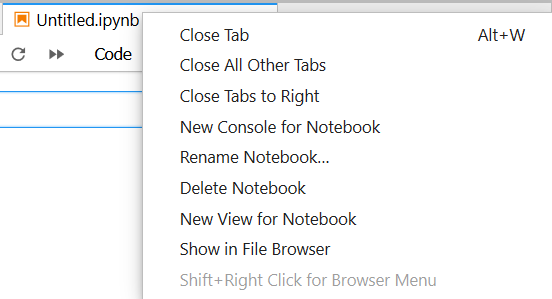
To create a new notebook, simply click "File" -> "New" -> "Notebook".
A new notebook will be created in a separate tab.
To rename this new notebook, right-click its tab and select Rename.
How to run a notebook ?
You can run the notebook document step-by-step (one cell at a time) by pressing "shift + enter" on the keyboard or by clicking the "play" button in the top menu
You can run the whole notebook in a single step by clicking on the menu Cell -> Run All.

The above (and current) cells are markdown cells, where text can be formatted (bullet points, numbering, images, etc.)
Below is a code cell:
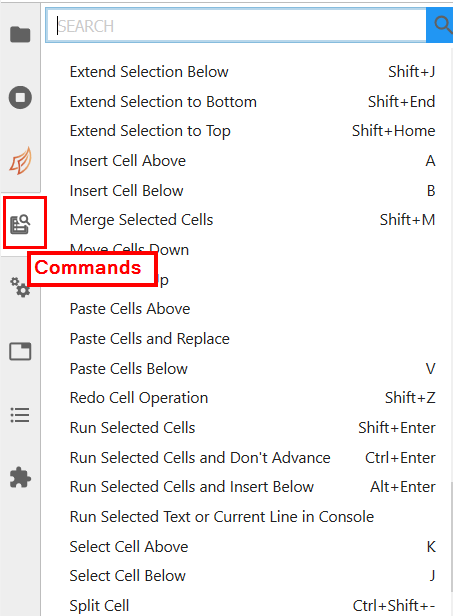
Keyboard shortcuts are available, the full list can be accessed by clicking the "commands" button on the left panel
Kernels
A notebook kernel is a “computational engine” that executes the code contained in a Notebook document. The ipython kernel, used in this demo, executes python code. Kernels for many other languages exist.
When you open a Notebook document, the associated kernel is automatically launched. When the notebook is executed the kernel performs the computation and produces the results. Depending on the type of computations, the kernel may consume significant CPU and RAM.
To change or restart a Kernel, use the dedicated menu
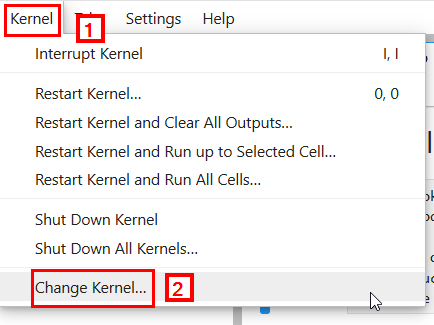
To restart the kernel (i.e. the computational engine), click on the menu Kernel -> Restart. This can be useful to start over a computation from scratch (e.g. variables are deleted, open files are closed, etc…).
Navigation
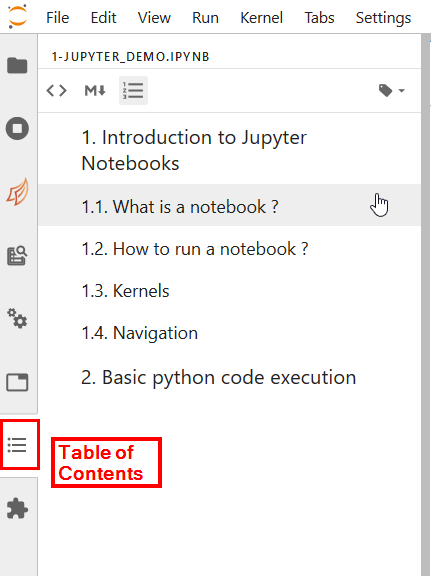
The "Table of Contents" button in the left menu opens a navigation panel that can be used to navigate.
The navigation is done thanks to different headings levels, within markdown cells. Using # symbols (e.g. the first level is "# Text")
Click on a section to navigate directly.
Basic python code execution
Create the variable "sum", and display the result by simply entering its name on a separate line.
Remember : to execute the cell below, click the play button or use the keyboard shortcut "shift + Enter"
Note that once a cell is executed, all the objects (variables) created are stored into memory. For example, the variable "sum" created above can be called again:
We can define methods:
Or classes:
# A Sample class with init method
class Person:

    # init method or constructor
    def __init__(self, name, age):
        self.name = name
        self.age = age

    # Sample Method
    def say_hi(self):
        print("Hello, my name is", self.name)
        print("My age is", self.age)


# Create object Person with attributes "Michael" and "44"
p = Person("Michael", 44)
# Display info
p.say_hi()
Display an object value:
Note that if the kernel is restarted, everything is cleaned up. To compute "p.age" again, all the above cells must me re-executed.
Notebooks are super handy
Markdown
Jupyter notebooks accept markdown to enhance the output. This can be useful to write interactive documentation for example.
Some examples of simple markdown in code cells output are given below:
from IPython.display import Markdown, display

display(Markdown("**BOLD TEXT**"))
display(Markdown("*Italic Text*"))
Compare text with the print function and display:
A more complex example with nice looking colors:
def printmd(string, color=None):
    colorstr = "<span style='color:{}'>{}</span>".format(color, string)
    display(Markdown(colorstr))


printmd("This line is blue", color="blue")
printmd("**This line is bold and red**", color="red")
printmd("This is a mixture of **bold**, *italic* text, <br>Heure is a line break<br>")
The function printmd can be used in place of print, without specifying a color to display nicer cell output:
Markdown can also link to other web pages.
To enter a link, simply write the address between brackets and the short name between square brackets.
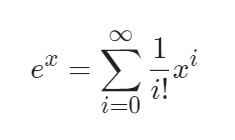
Display equations
using Markdown, it is possible to display LaTeX equations:
Widgets
Jupyter notebooks can be enhanced with widgets
The cell below defines several widgets:
import ipywidgets as widgets
from IPython.display import display

style = {"description_width": "initial"}
widget1 = widgets.ToggleButtons(
    options=["Option 1", "Option 2", "Option 3"],
    value="Option 1",  # Default value
    description="Choose an option",
    disabled=False,
    button_style="danger",
    tooltips=["Tooltip for option 1", "Tooltip for option 2", "Tooltip for option 3",],
    style=style,
)

widget2 = widgets.Checkbox(
    value=True, description="This is a checkbox", disabled=False, style=style,
)

widget3 = widgets.IntSlider()

print("The first widget value is: ", widget1.value)
print("State of the second widget: ", widget2.value)
print("Value of third widget: ", widget3.value)
Other interesting stuff
Display progress bars
A simple progress bar:
from tqdm.notebook import tqdm, trange
import time

for i in tqdm(range(100), desc="Just waiting"):
    time.sleep(0.1)
We can also use nested progress bars:
for i in trange(4, desc="Main computation"):
    for j in trange(5, desc="Intermediate computations"):
        time.sleep(0.5)
    if i == 3:
        print("Done !")
Using shell commands
Simply start a code cell with an exclamation mark to run a shell command:
Magic commands
Magic commands are special commands that help with productivity.
For example, to display all variables:
To measure the execution time of a line:
To measure the execution time of a cell: